By: | Published: August 19, 2026
A properly prepared construction site is graded to shed water, compacted to at least 95% Standard Proctor, cleared and permitted, and confirmed utility-safe before a single footing gets poured. Site preparation for construction is the sequence that gets you there, and skipping steps is the fastest way to blow a schedule.
Here’s the mini checklist to start mobilization:
- Permits and geotech report: owner or general contractor files permits; geotechnical engineer delivers bearing capacity and groundwater data.
- Boundary and topographic survey: licensed surveyor sets property lines and staking for footings.
- Utility locate (call 811): utility companies mark buried lines before any digging starts.
- Land clearing: tree service or land-clearing crew removes vegetation, stumps, and debris.
- Erosion controls: civil contractor installs silt fences and inlet protection ahead of grading.
- Grading and compaction: civil contractor grades to a minimum 2% slope away from structures and compacts according to engineering specifications.
Key Takeaways
Successful site preparation for construction requires sequencing permits, surveys, geotech work, clearing, grading, and utility coordination correctly, with compaction and drainage verified against code before any foundation work begins.
| Point | Details |
|---|---|
| Start permits early | File permits and order the geotech survey the same week to avoid schedule bottlenecks. |
| Meet compaction targets | Verify 95% Proctor for residential subgrades and 98 to 100% for commercial pads with density testing. |
| Grade for drainage | Slope at least 2% away from structures, extended 10 feet where site space allows. |
| Coordinate clearing before grading | Loop in an arborist and land-clearing crew before finalizing staking and grading plans. |
| Document everything | Photograph utility markings, compaction tests, and drainage swales for compliance and dispute protection. |
| Hire specialists for tree removal | Mcculloughtreeservice handles protected-tree assessment, clearing, and stump grinding as part of Central Florida site prep. |
Table of Contents
- Why Thorough Site Preparation Prevents Cost and Safety Failures
- How Do You Prepare a Construction Site Step by Step?
- What Tolerances and Safety Rules Must a Site Meet?
- When Do You Need an Arborist for Land Clearing?
- What Site-Prep Mistakes Cause the Most Rework?
- What Environmental Reviews Does Site Prep Require?
- How Should Construction Waste and Debris Be Handled?
- How Do You Plan for Unexpected Site Conditions?
- Where to Verify These Standards
- What Actually Determines Whether a Site Is Ready
- Get Site-Ready Land Clearing Without the Guesswork
- Sources
- FAQ
Why Thorough Site Preparation Prevents Cost and Safety Failures
Site prep isn’t a checkbox before the “real” work starts. It is the real work, and rushing it shows up later as cracked slabs, standing water, and blown budgets. One industry estimate puts poor preparation behind roughly 30% of construction delays and cost overruns. Thorough prep can cut rework by 10 to 20%.
Every hour spent on soil testing and utility locates upfront saves days of change orders later. The gap between those two numbers is your contingency budget.
Pro Tip: File permit applications the same week you order your geotechnical survey. Permitting is often the longest pole in the tent, and running it in parallel with soil testing instead of after it can save weeks.
How Do You Prepare a Construction Site Step by Step?
Construction site readiness follows a logical order. Skip a step or run it out of sequence, and you’ll likely redo work you already paid for. Here’s the sequence that holds up on most residential and commercial jobs.
- Planning and permits. The owner or general contractor pulls grading, land-disturbance, and building permits. Lead times run one to four weeks depending on jurisdiction and site complexity, so this starts before crews mobilize, following the sequencing recommended in most professional site-prep guides.
- Boundary and topographic survey. A licensed surveyor establishes property lines, elevations, and staking points for footings. This drives everything downstream, including grading cuts and utility routing.
- Geotechnical investigation. Borings at intervals across the footprint reveal soil bearing capacity, groundwater depth, and expansive-soil risk. The report tells your structural engineer whether you’re building on a standard spread footing or need piers.
- Land clearing and demolition. Tree removal, stump grinding, and grubbing come next, with disposal handled through permitted haul routes. Protected species and heritage trees may need a separate review before removal.
- Erosion and sediment control. Silt fences, inlet protection, and stabilized construction entrances go in before dirt starts moving, not after. Sites disturbing more than one acre typically trigger SWPPP requirements under regional stormwater rules.
- Utility locating and temporary services. Call 811 to have utilities marked, then coordinate with providers on any relocations. Temporary power, water, and site toilets typically follow immediately after.
- Compaction and testing. Fill is compacted in controlled lifts, typically 6 to 12 inches each, and verified with nuclear density testing at intervals your geotech report specifies.
- Final verification. Before concrete pours, the engineer signs off on compaction reports, as-built grading checks, and photo documentation of utility markings and drainage swales.
| Phase | Typical duration | Primary cost driver |
|---|---|---|
| Permitting and geotech | 1 to 4 weeks | Jurisdiction complexity, number of borings |
| Survey and staking | 2 to 5 days | Site size, terrain complexity |
| Clearing and demolition | 3 days to 2 weeks | Tree density, protected species review |
| Grading and compaction | 1 to 3 weeks | Earthwork volume, dewatering needs |
| Final verification | 2 to 4 days | Number of compaction tests required |
Timelines shift fast once you add complications. Wet soils that need dewatering, unexpected rock, or a discovered utility conflict can each add a week or more, so build slack into the schedule rather than pretending the table above is fixed.
What Tolerances and Safety Rules Must a Site Meet?
Numbers matter here, because inspectors and engineers will check them. Drainage grading needs a minimum 2% slope away from structures, roughly a quarter inch per foot, extended out 10 feet where space allows under IRC Chapter 4. Some jurisdictions specify steeper slopes near the foundation when 10 feet of clearance isn’t available, so check your local adopted code before finalizing grades.

Compaction targets run 95% Standard Proctor for residential subgrades and 98 to 100% for commercial pads carrying heavier loads. OSHA excavation standards require utility locates before any digging, protective systems or sloping at roughly 1½:1 for most soil types, safe egress for any trench deeper than four feet, and a daily inspection by a designated competent person.
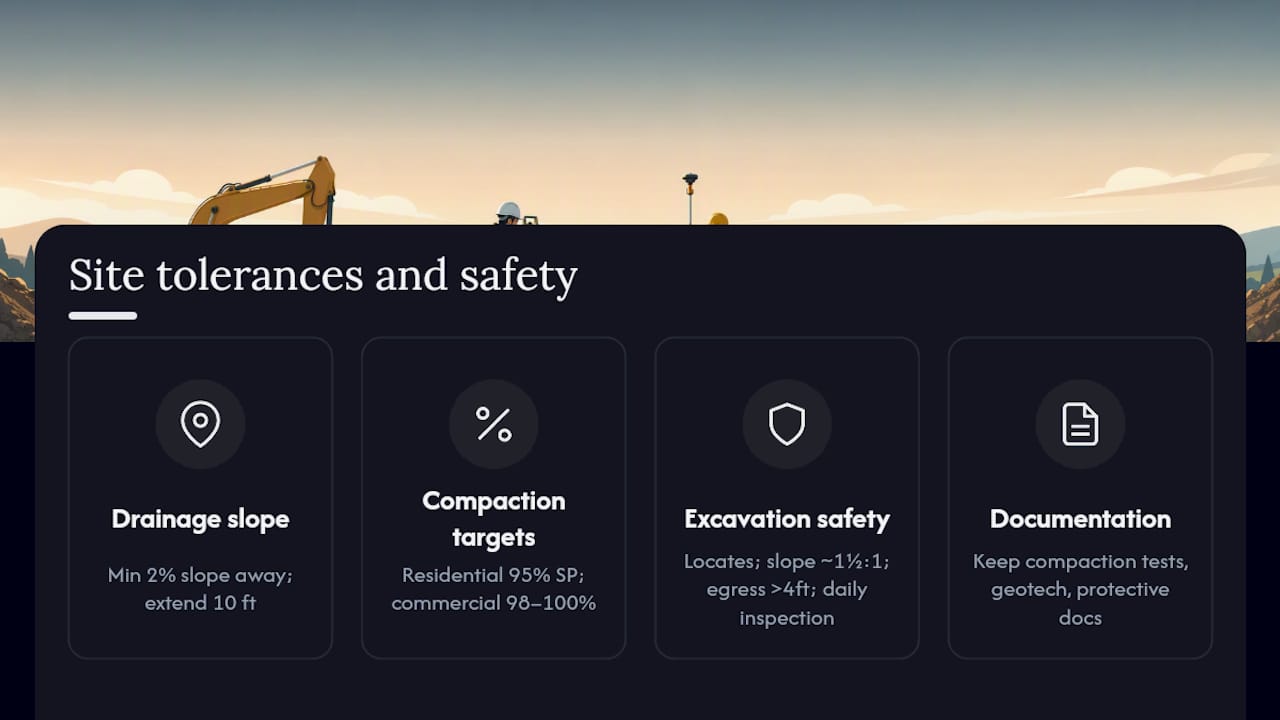
Pro Tip: Keep compaction test certificates, the geotech report, and excavation protective-system documentation in a jobsite binder or shared drive. Inspectors and lenders both ask for these, and scrambling to find them mid-inspection costs you a day you didn’t budget for.
When Do You Need an Arborist for Land Clearing?
Not every clearing job is a bulldozer job. Bring in a certified arborist when the site has protected or heritage trees, when a preservation plan is required by local ordinance, or when root protection zones near retained trees could affect your grading plan.
- Check local tree ordinances before removal; many municipalities require permits for trees above a certain diameter.
- Grind stumps at least a foot below finished grade if the area will carry structural fill or hardscape.
- Strip and stockpile topsoil before clearing debris moves it around, so you’re not paying to truck in fill later.
- Time erosion controls to go in immediately after clearing, not days later, since bare soil erodes fast in the first rain event.
Loop your land-clearing crew in with the surveyor and geotech engineer before work starts. Removing a stand of trees changes drainage patterns and can expose root systems that affect bearing capacity right where a footing was planned.
Pro Tip: If a tree sits within 10 feet of a planned foundation line, get the arborist’s root assessment before the surveyor finalizes staking. Moving a footing line two feet after staking costs far less than moving it after excavation starts.
What Site-Prep Mistakes Cause the Most Rework?
The costliest mistakes are almost always omissions, not bad execution. Watch for a bid missing a geotechnical scope entirely, a schedule with no line item for permit approval, or a proposal that skips utility locate documentation.
- No compaction testing plan or unspecified testing frequency.
- No written erosion-control or SWPPP plan for sites over one acre.
- Vague or missing access and haul-route plans for heavy equipment.
- Tree and vegetation constraints not assessed before grading design.
If you see these gaps, ask for the geotech scope in writing, request proof of the 811 utility locate, and require daily competent-person inspection logs before signing anything.
What Environmental Reviews Does Site Prep Require?
Most jurisdictions require some form of environmental review before major earthwork, and the scope depends heavily on site size, wetlands proximity, and disturbed acreage. A basic environmental assessment typically checks for wetlands, protected habitat, contaminated soil history, and floodplain designation before a shovel touches the ground.
Mitigation usually centers on three things: protecting adjacent water bodies from sediment runoff, controlling dust during dry-season clearing, and preserving mature trees outside the building footprint where feasible. Sites near wetlands or waterways often need a buffer zone with no disturbance at all, which your civil engineer should flag during the design phase, not after grading equipment shows up.
Noise and dust ordinances vary by municipality and by time of day, so confirm allowable working hours before you schedule heavy equipment. Skipping this check is a common source of neighbor complaints that stall permits mid-project.
Runoff control ties directly back to your SWPPP plan. Silt fences, sediment basins, and stabilized entrances aren’t just an erosion issue, they’re often the specific mitigation measure your environmental permit requires you to document. Keep photos of installed controls dated and time stamped, since regulators may ask for proof they went in before, not after, clearing began.
How Should Construction Waste and Debris Be Handled?
Land clearing and demolition generate three distinct waste streams, and mixing them costs money. Green waste, tree limbs, brush, and grubbed vegetation, can often be chipped or mulched on-site or hauled to a composting facility rather than a landfill. Demolition debris, concrete, masonry, and old structures, usually needs a permitted construction and demolition landfill or a recycling facility that separates aggregate for reuse.
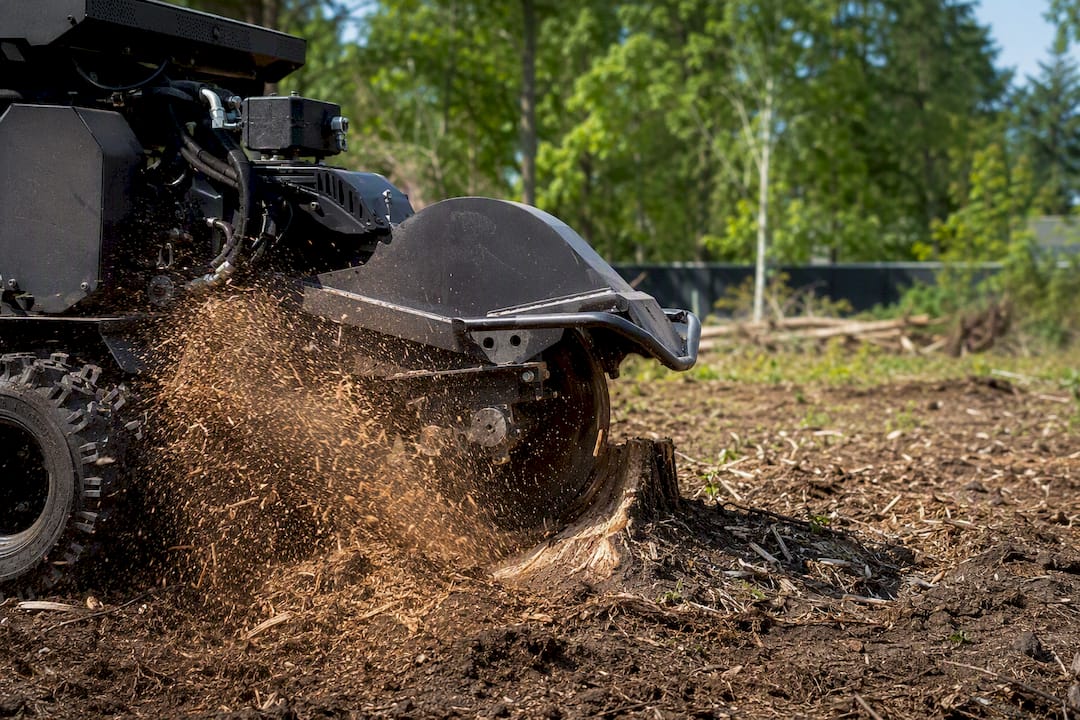
Stumps deserve their own line item. Grinding produces mulch that’s reusable on-site, while full stump removal generates bulkier waste that needs hauling. Decide which method you’re using before clearing starts, since it changes your equipment and disposal cost.
Hazardous materials, old fuel tanks, treated lumber, or contaminated soil found during excavation, require specialized disposal under separate regulations. If your geotech report or a demolition survey flags any of these, budget separately and get quotes before excavation begins, not after a crew hits something unexpected.
Track disposal manifests and weight tickets for every load leaving the site. Beyond the paperwork trail, many jurisdictions now require documented diversion rates for green waste and recyclable demolition debris as a condition of the permit itself.
How Do You Plan for Unexpected Site Conditions?
Every experienced site manager has a story about the borehole that missed the rock ledge, or the utility line that wasn’t where the locate marks said it would be. Contingency planning isn’t pessimism, it’s what separates a two-week delay from a two-month one.
Build a contingency line into both budget and schedule before you break ground, not after you hit a problem. A reasonable starting point is treating unexpected subsurface conditions, rock, groundwater, unmarked utilities, as a near-certainty on any site larger than a standard lot, and pricing accordingly.
Have a pre-negotiated rate with your geotech engineer for supplemental borings if initial soil data doesn’t match what excavation reveals. Waiting to negotiate that rate mid-crisis costs more and burns days you don’t have.
Weather delays deserve their own buffer, particularly for grading and compaction work that can’t proceed on saturated soil. Track rain days against your schedule from week one so a stretch of bad weather doesn’t quietly eat your entire contingency without anyone noticing until the deadline arrives.
Finally, keep one person, usually the site superintendent, as the single point of contact for any discovered condition. Splitting that decision authority across multiple parties is how a one-day pause turns into a week of confused change orders.
Where to Verify These Standards
- IRC 2021 Chapter 4 for drainage and foundation tolerances.
- OSHA excavation standards for trenching and protective-system rules.
- OSHA site-prep guidance for heavy-equipment safety sequencing.
What Actually Determines Whether a Site Is Ready
Most site-prep guides treat every step as equally weighted, a checklist where item six matters as much as item one. It doesn’t. The geotechnical report and the utility locate are the two items that, if wrong or skipped, cause damage you cannot grade or compact your way out of later. Everything else, timeline, temporary toilets, haul routes, is logistics you can fix mid-project without touching the structure.
The conventional advice undersells arborist coordination specifically. Most guides treat tree removal as a demolition line item instead of a decision that reshapes your drainage plan and root-affected soil bearing near the foundation. A tree removed two weeks after staking instead of two weeks before it is the single most avoidable rework trigger on residential lots with mature trees.
Prioritize the geotech report and utility locate first, get your tree and land-clearing decisions locked before staking, and treat the compaction testing schedule as non-negotiable paperwork you keep on file, not an afterthought you produce if asked.
Get Site-Ready Land Clearing Without the Guesswork
Most site-prep guides tell you to “hire a land-clearing crew” and leave the how to you. Mcculloughtreeservice handles the piece of that checklist that trips up the most schedules: assessing protected trees, coordinating removal timing with your grading plan, and grinding stumps to the depth your compaction spec actually needs.

If your Central Florida site has mature trees, brush, or stumps standing between you and a compacted, permit-ready pad, that’s exactly where certified arborist judgment earns its cost. Mcculloughtreeservice’s crews handle everything from selective tree removal to full-site land clearing, sequenced so your surveyor and civil contractor aren’t reworking stakes after the fact. Request a site assessment before you finalize your grading plan, and get a clearing timeline that fits your permit schedule instead of fighting it.
Sources
- OSHA eTools — Oil and Gas: Site Preparation
- OSHA Excavation Safety — Publication OSHA 2226
- Site Preparation Guide 2026: Steps, Costs, Expert Checklist — HBG Civil
FAQ
What does “site preparation for construction” actually include?
It covers permitting, boundary and topographic surveying, geotechnical testing, land clearing, utility locating, grading, compaction, and final verification before foundation work starts.
How long does site preparation typically take?
Simple residential lots can be ready in two to three weeks; larger or complex commercial sites often take four to eight weeks once permitting, clearing, and compaction testing are factored in.
What compaction level does my site need?
Residential subgrades typically need 95% Standard Proctor, while commercial pads carrying heavier loads often require 98 to 100%, depending on your geotech engineer’s recommendation.
Do I need a permit to clear trees before construction?
Most municipalities require a permit for removing trees above a certain diameter or for any protected or heritage species, so check local ordinances before clearing starts.
What happens if I skip the geotechnical report?
You risk building on soil with inadequate bearing capacity or undetected groundwater issues, which can cause foundation settling or cracking that’s far more expensive to fix after the pour than before it.
Recommended
- Site Preparation Guide for Central Florida Property Owners
- Land Clearing Process Guide for Property Owners
- How to Plan Land Clearing: A Step-by-Step Guide